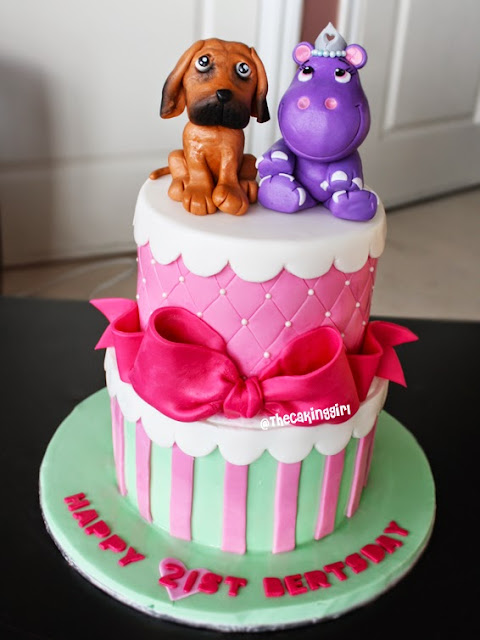
HOW TO MAKE A CUTE HIPPO CAKE TOPPER
CUTE HIPPO FIGURINE TUTORIAL
WITH FONDANT, GUMPASTE OR CLAY
2. It should look like this, the top part is smaller than the bottom.
3. Make a small oval shape for the body, and secure a toothpick inside to attach the head on later. I made the body smaller than the head, I think it's cuter that way, but you can do it any size you'd like.
4. For the ears, use two different size circle cutters.
5. With water, glue the ear pieces together. With an exacto knife, trim a bit off at the bottom of the ears so it's a flat surface to flue onto the head.
6. For the eyes, make two of each - white tear drop shape, then pink circle, and a smaller purple circle.
7. Attach all the eye pieces together, with the colored pieces at the point of the teardrop. Trim off at pieces that are sticking out.
8. Glue the ears and eyes onto the hippo's head.
9. With a large circle cutter, press it into the bottom of the head to make the smile.
10. With an exacto knife, make the smile brackets on both sides.
11. With a round ball tool, push in two dents for the nose. Roll out pink fondant really thin and cut out 2 circles that would fit into the dents.
12. Glue them into the nostrils.Push them in with a ball tool.
13. Make 2 small triangular shapes for the legs, with exacto knife, mark where the toes are.
14. Do the same for the arms, except they are slightly longer than the legs.
15. Use a small circle cutter to cut out white fondant, use an exacto knife to cut the circles in half.
16. Glue the white pieces at the end of the arms and legs. Attach the body onto the two legs.
17. Assemble the arms.
18. Put the head on, you're done! :)
PIN, SAVE, SHARE THIS TUTORIAL! :)


Great creativity man and how perfectly this cake has done. Good job and please also share something that is related to the making of perfect dough of cake. Thanks
ReplyDeleteThe free roblox robux game is now with free robux generator for the free robux generation for the game.
ReplyDeleteWhy does it say happy birtsday instead of happy birthday?Also love it thank you for the tutorial!!!!!!!!!!
ReplyDeleteMoldova yurtdışı kargo
ReplyDeleteMoğolistan yurtdışı kargo
Mikronezya yurtdışı kargo
Mısır yurtdışı kargo
Melilla yurtdışı kargo
0TCT
kuşadası
ReplyDeletemilas
çeşme
bağcılar
urfa
AB4MF
Mali yurtdışı kargo
ReplyDeleteMalezya yurtdışı kargo
Maldiv Adaları yurtdışı kargo
Malavi yurtdışı kargo
Makedonya yurtdışı kargo
U0OZA
Libya yurtdışı kargo
ReplyDeleteLiberya yurtdışı kargo
Lesotho yurtdışı kargo
Laos yurtdışı kargo
Kuzey Marina Adaları yurtdışı kargo
7RE
Kuzey İrlanda yurtdışı kargo
ReplyDeleteKuveyt yurtdışı kargo
Kosta Rika yurtdışı kargo
Kosraey yurtdışı kargo
Güney Kore yurtdışı kargo
KMT5