Showing posts with label frozen. Show all posts

Monday, May 25, 2015

My Frozen Elsa Anna Olaf Cake and Cupcake Designs!


My Frozen custom cakes and cupcakes!
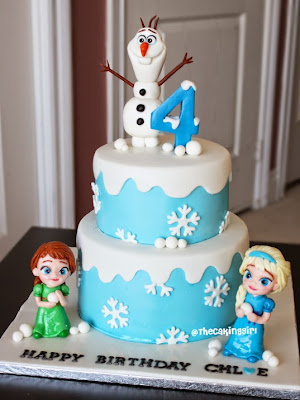
frozen childhood anna elsa birthday cake

Okay, I've made so many Disney Frozen cakes, it's enough to start it's own album on my Facebook Page lol. I try to make them each a different design while still catering to what the person wants.
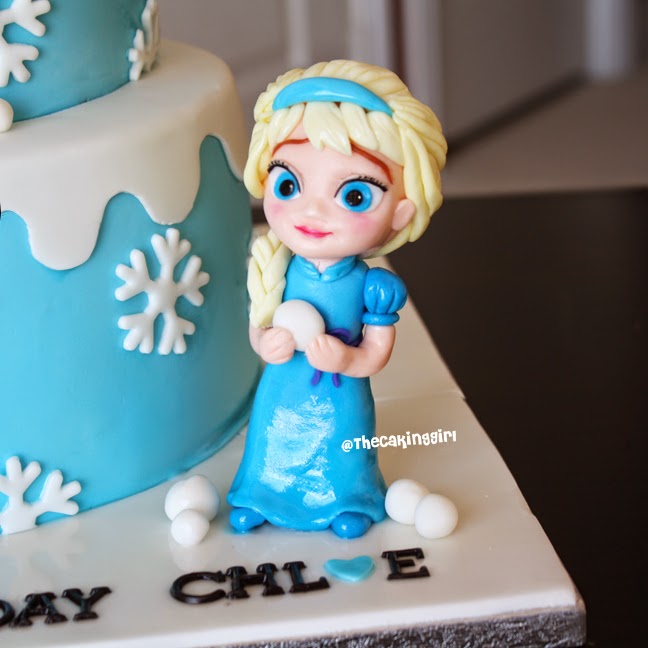


I've only had one request to make childhood Anna and Elsa, I loved how
the figurines turned out, I used gumpaste to make both Frozen cake toppers.

edible frozen anna figurine cake topper how to


My edible Frozen Anna childhood figurine!


pretty best frozen cupcake toppers elsa anna olaf

Probably my most detailed cupcakes to date. I spent about 3-4 hours on each 
Anna and Elsa cupcake toppers. Olaf was 25 mins, the snowflakes were less time.

how to make edible frozen elsa figurine cake

 I think this is my fave edible Elsa cake topper figurine. She's made with gumpaste.

beautiful frozen elsa figurine edible 3 tier cake

3 tier Frozen Elsa cake.

beautiful frozen elsa anna olaf figurines on cake

Here's a 2 tier Frozen cake design, with all 3 characters, 
Anna, Elsa and Olaf cake toppersare made with gumpaste and entirely edible.

how to make frozen elsa anna figurine gumpaste

Close up of Elsa and Anna!

cute simple olaf figurine cake topper cake

A simple Olaf cake for a boy turning 3.

frozen elsa figurine tutorial

Edible Frozen Elsa figurine.

pretty frozen elsa olaf birthday cake
how to make olaf figurine tutorial diy

An ombre blue cake with a Disney Frozen design.

pretty elsa and anna doll cake, elsa and anna barbie dress cake

Elsa and Anna doll cake!


Frozen cupcakes I made last year.

And my first Frozen cake last year.

beautiful elsa and anna figurines on cake


If anyone like to know how I made the edible Olaf figurine cake topper, here's a tutorial:


  PIN AND SHARE THIS POST!


best disney frozen cakes designs tutorial
 

Tuesday, November 11, 2014

Fondant Olaf Figurine Tutorial


how to make olaf figurine tutorial


Hey everyone! Thanks for visiting my site! I've put together an Olaf figurine tutorial video here,
or if you prefer, a pictorial is below. If you like my tutorials, enter your email on the right side of this blog to subscribe to my blog updates! Also follow me on Pinterest, I post all my new tutorials there!


IF YOU LIKE THIS POST,
 PIN, SAVE, SHARE!


how to make frozen olaf figurine, gumpaste

Follow my Facebook for more tutorials and cake pix!


Olaf Figurine Tutorial, how to make Olaf!

1. Materials you'll need: 
- white fondant
- small clump of black fondant
- small clump of orange fondant
- small clump of brown fondant
- ball tip tool or you can use back of a paint brush
- exacto knife
- 3 toothpicks
- small roller
- thin paint brush
- edible blue color
- tylose or gumpaste powder (not shown in pic, oops!)
 you'll need to knead this into the fondant before starting

2. Make white fondant into Olaf's head shape. I used the small roller and pressed that on for the top of his head, and also below his nose, to make his middle nose part more prominent. I used the tip of the roller to push in the 2 indents on both sides of his well as well. Flat part of the roller can flat/smooth the sides of his mouth.

3. Exacto knife to create the smile.

4. Use the exacto knife and cut out the smile.  It's okay if the cut isn't perfectly smooth/flat.

5. Use a ball tip tool or the back of a paint brush, and flatten the fondant inside the mouth opening.

6. Roll out a thin piece of black fondant and cut it into the shape of his mouth.

7. Add water for it to stick on, then use the ball tip tool or back of paintbrush and smooth out the black fondant. 

8. Roll out a small piece of white fondant, place a plastic wrap over and use a small circle cutter to cut the eyes. The plastic wrap will smooth out the circle into a dome shape rather than a flat coin shape.

9. Glue the eyes down with water.

10. Dilute the blue color gel with a few drops of water, or vodka or lemon extract. Paint around the eyes a small border of blue.

11. With black fondant, place eye balls and eye lid onto his eyes.  For the eyelids, I pinch a but of black fondant and roll it really thin with my fingers.

12. Roll really thin brown fondant with your fingers, for eyebrows.

13. Roll really thin brown fondant into a rectangular shape. add some water inside and place a toothpick in the center. Fold the fondant over and make a straight cut beside the tooth pick.  Roll a bit of brown fondant into a thin V shape and glue it on as fingers.

14. Use white fondant to create the body parts.

15. Use black fondant and make the 3 buttons. Let the pieces dry for at least an hour to let them harden before assembling. Assemble the body parts together with a tooth pick in the core and leave a bit of tooth pick sticking out at the top of the body to add the head on.

Happy Caking everyone! <3


Monday, June 30, 2014

Frozen Cupcakes! With Olaf, Elsa and Anna!

Hey guys! Just wanna share with you my Frozen Cupcakes! 

pretty frozen elsa cupcake toppers, pretty frozen anna cupcakes

Follow my Facebook for more tutorials and cake pix!


how to make frozen elsa cupcake toppers

A quick Frozen Elsa tutorial I made on my phone. 
I printed an image of Elsa and Anna from my computer, and cut out all the details.
I placed parts of them onto rolled fondant and cut around it with an exacto knife.
This method ensured me that it'll be the same size and shape as the image.